Category: Tutorials

How to Buy on Faranux Electronics ( with Pictures )

You wonder how you can place an order or buy the things you need via Faranux Electronics website?  www.faranux.com, This tutorial is for you.

you can buy from your work, your home comfort or from anywhere worldwide, here is guide with pictures that shows you step by step how you can place an order online.

Faranux Electronics is an online retails shop that has been around for people with interest in electronics.

Students, hobbyists, researchers, hardware products developers, tinkers,small and medium enterprises. we have Components,Sensors,Discrete semiconductors parts,Development boards, Starter kits, Tools and Measurement instrument that suit your application.

The following are steps to follow:
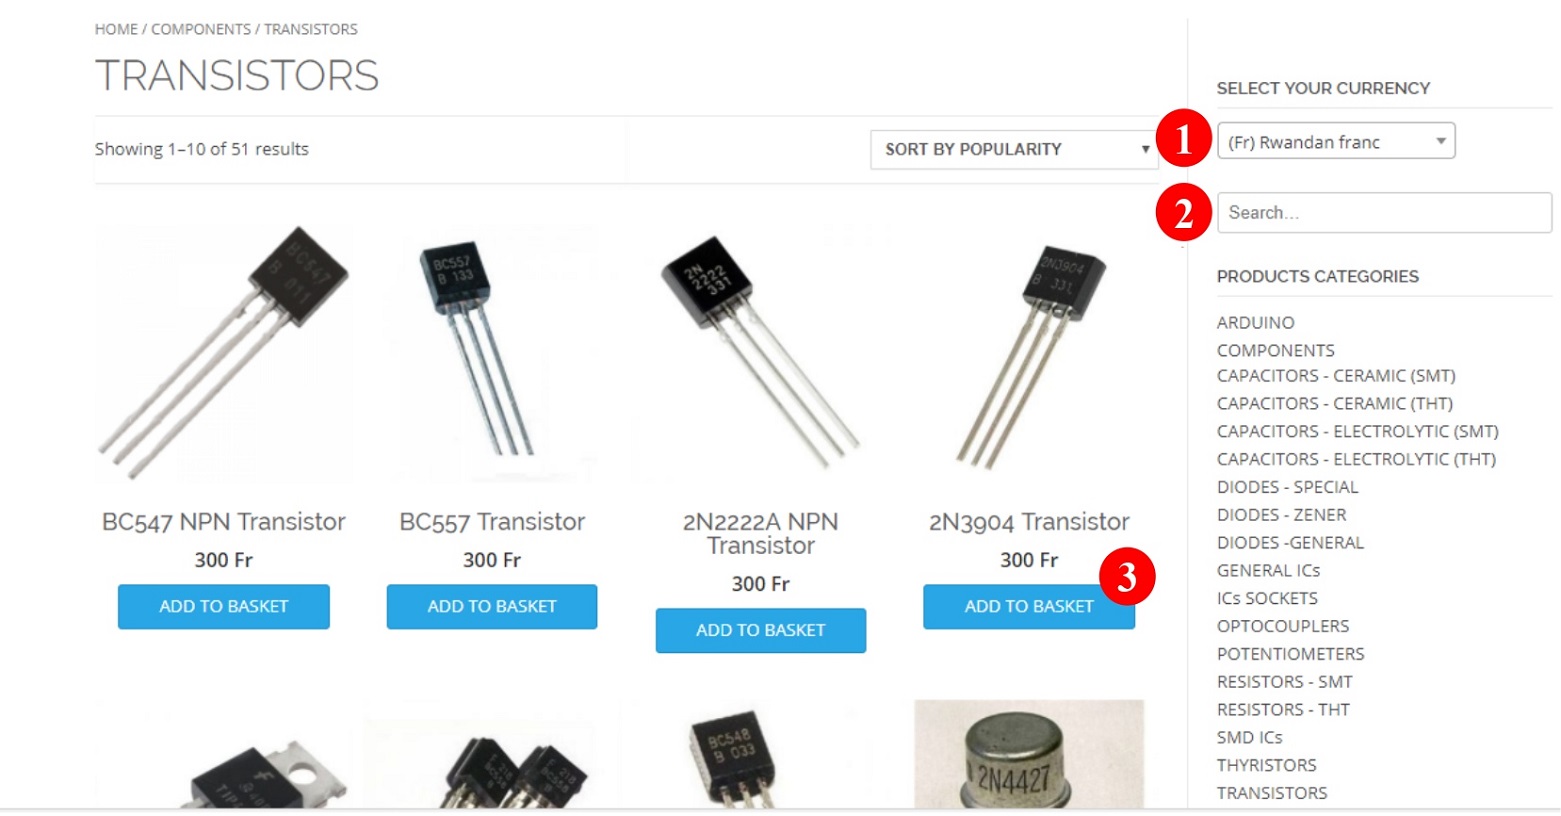
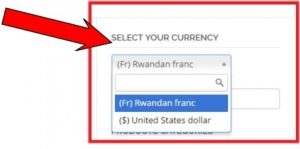
  1. Select your currency:  The currency switcher is located in top right corner. There 2 currencies on the website, one being Rwandan franc (Fr) and the United States dollar ($)

Note that the currency acceptable for all international orders is $ and the payment method is PayPal .

while people in Rwanda can use both currencies ($ and Fr) if you want to pay by using PayPal you will need to switch to $.

2. Search  for the item(s) by using the search bar or by using products categories located on the right side then

3. Add to the basket the product(s). You can add many items in the cart as much as you want; remember, items are not yours until you check out!
  1. Calculate Shipping

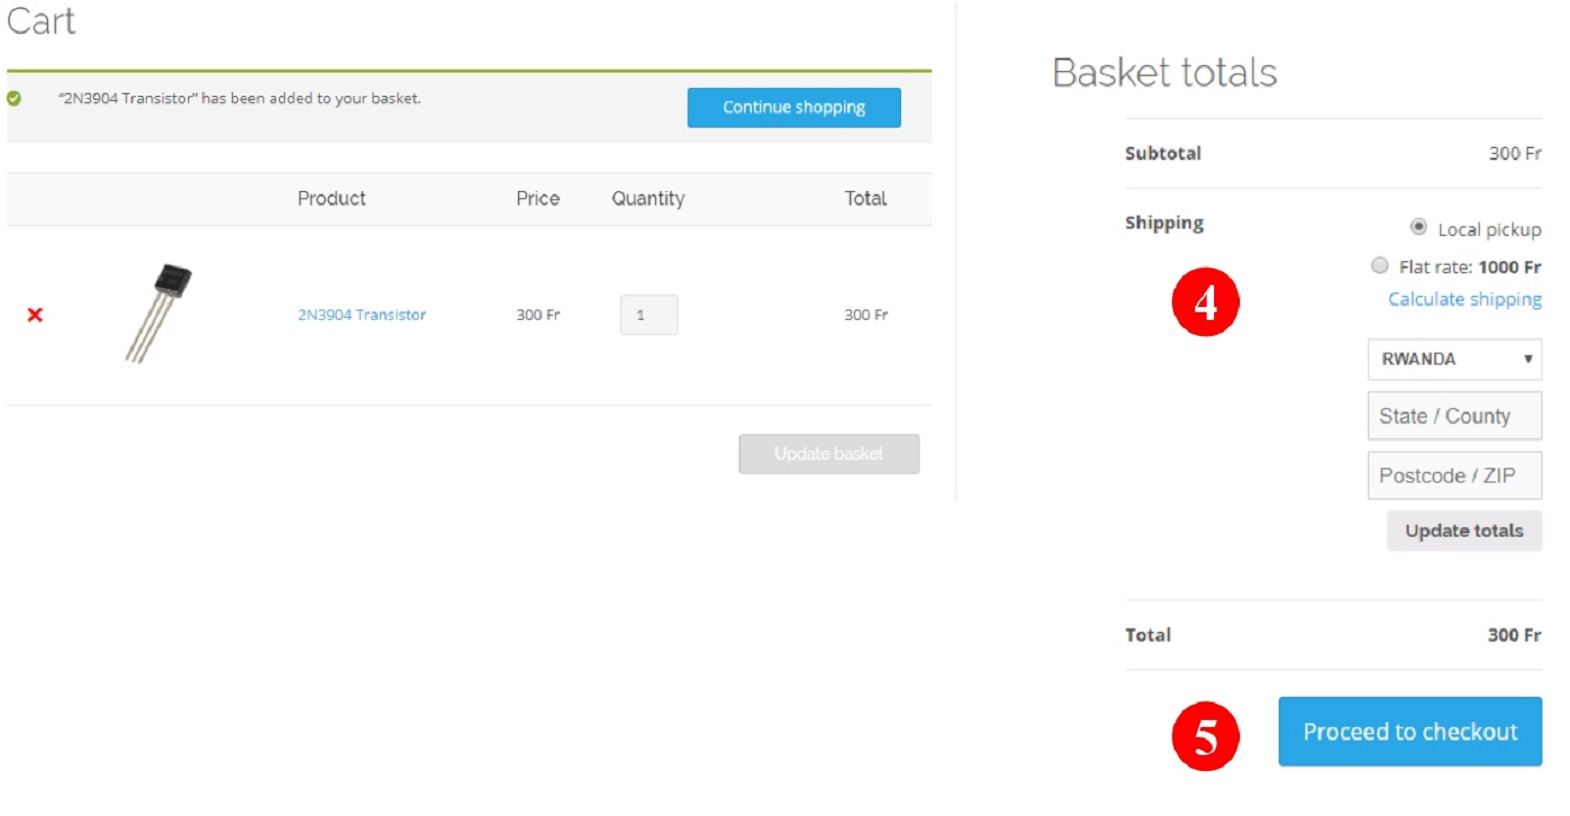
After loading item(s) in the cart you will need to calculate the shipping  and Select Flat rate  before proceeding to checkout, if you are located in Kigali; you can select Local Pickup as a shipping method in checkout. If you select this option, we’ll hold your order here so you can come pick it up. If you want your order to be delivered to your door then calculate the shipping cost by selecting Rwanda as your country.

5. Proceed to Checkout

You will be able to select your payment method by clicking on the proceed to checkout button,

the payment methods includes:

1.Local Payments

a) Cash on deliver

b) Bank transfer

c) Paypal : Only in $

d) Mobile Money: Customer covers sending and receiving chargers

2. International Payments:

a) Paypal

b) Bank transfer

NOTE: Most international shipments will incur additional fees in the form of duties and taxes. These fees are your responsibility


How to make your own Arduino on Breadboard

Want to save money by making your own arduino clone boards? Or want to make a custom board specifically for your needs, then this DIY project is for you. Make arduino board from cheap electronic components available at your local store. Just follow these simple step by step instructions. DIY : Make arduino board and bootload ATmega chip. Have fun with this DIY hacking tutorial!

What are the stuff required to do this project?

Hardware :

  1. An arduino bootloader ATmega328/168 or any compatible Atmel IC. Or a blank ATmega328 , ATmega168 , ATmega 8 IC or any other compatible Atmel chips.
  2. LM7805 IC.
  3. 16 Mhz crystal.
  4. Tactile button.
  5. Led’s.
  6. Capacitors – 22pF (2 Nos), 10uF (2 Nos), 0.1uF (2 Nos).
  7. Resistors – 220Ohm (2 Nos), 1k (2 Nos).
  8. Pin headers (Male).
  9. 28 pin IC socket.
  10. Avr pocket programmer (Optional , only if uploading bootloader).

Software :

  1. Arduino IDE : Arduino.
  2. Terminal for linux users and Command prompt for windows.
  3. Avrdude.

Tools :

  1. Soldering iron.
  2. Solder lead.
  3. Prototyping solder dot board / breadboard or materials to etch your own board.

Step 1 : Connecting the components together to make arduino board

Make arduino board and bootload

Arduino on breadboard

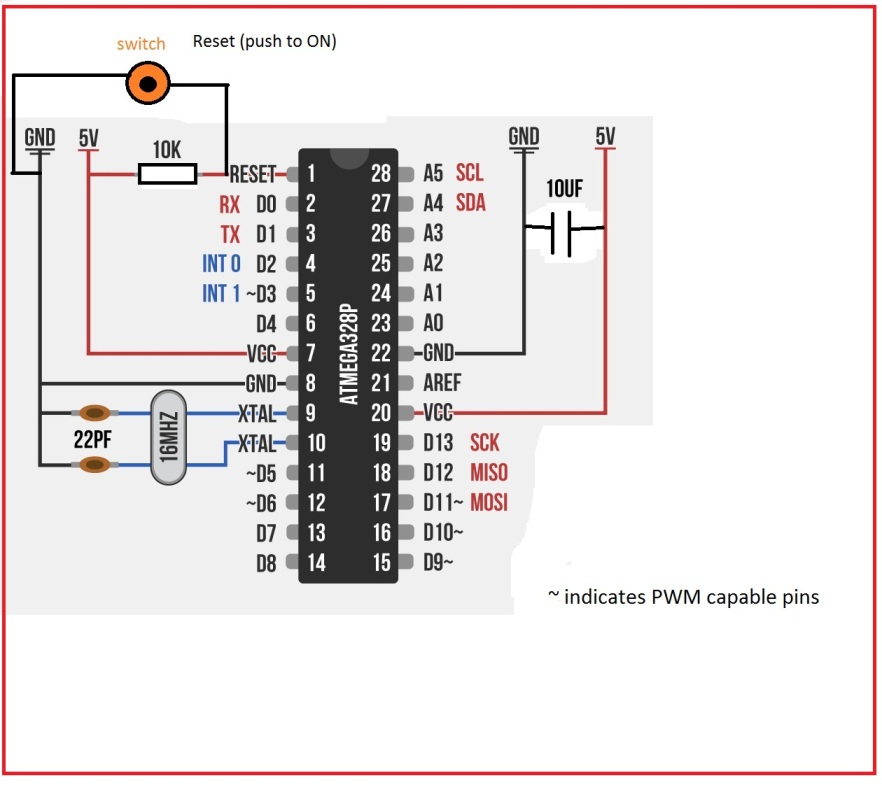
You can either etch a pcb to make your custom board or use a prototyping dot board to merely solder the components on it. Or even arrange them on a breadboard. Connect the components with each other just like in the diagram below. There are only a very few components required to make your custom arduino board. A voltage regulator to supply 5V to arduino. it’s supporting circuitry to filter the voltage; then a 16Mhz cystal along with it’s parallely connected 22pF capacitors that acts as the clock to the arduino. And an led connected to pin no 19 of the ATmega , for testing purposes.  Use the schematic if you want to etch your own pcb. Modify the schematic to make arduino board suited for your project. Use this eagle schematic file if you want to make a custom pcb : DIY Hacking arduino schematic.

Make arduino board and bootload

Custom arduino schematic: Make arduino board

Step 2 : (Optional step) Uploading the bootloader to the blank ATmega chip

This step is for those who have a blank ATmega chip and want to upload the arduino bootloader to it. Others who already have an arduino bootloaded chip can ignore this step and merely insert their chip based on the schematic in the above step. Here you can either use another arduino to bootload the blank chip or use an AVR pocket programmer. I will explain both the methods as follows :

USING AN AVR POCKET PROGRAMMER :

Make Arduino board and bootload

Arduino and AVR programmer connections

I personally prefer uploading the bootloader using this method as it works most of the time. You just need to buy an AVR pocket programmer. Once you have that, you will be able to burn the bootloader to various types of ATmega chips .Insert the blank chip to the socket of an arduino board.  Connect the programmer to arduino as in the diagram above.

Go to your installed arduino folder -> hardware -> arduino -> boards.txt . Then check the document for your chips name and the bootloader (Duemilanove / Uno) (this step can be ignored if your using  blank ATmega328P chips). Check the values of the following parameters on it : efuse, hfuse and lfuse. Now we will set the fuse bits for the blank chip. Open the command prompt (windows users) or terminal (linux users) and paste the following commands :

NOTE : Substitute the value for efuse, hfuse and lfuse parameters after checking the boards.txt file and edit “m328p” in the below command to your chips name only if it is not an ATmega328 IC.

avrdude -b 19200 -c usbtiny -p m328p -v -e -U efuse:w:0x05:m -U hfuse:w:0xD6:m -U lfuse:w:0xFF:m  

Next, use the command below to upload the bootloader or your hex program file. Go to the path of your program file or bootloader (/hardware/arduino/bootloaders/atmega) from the command prompt or terminal and instead of “hexfilename.hex” substitute the name of your file.

avrdude -b19200 -c usbtiny -p m328p -v -e -U flash:w:hexfilename.hex -U lock:w:0x0F:m

Now the file will be successfully uploaded to the ATmega chip.

USING ANOTHER ARDUINO AS ISP :

Make arduino board and bootload

Arduino as ISP

If your using another arduino to bootload the chip then make connections as per the diagram above. You will also need two arduino boards for this : one will be a working arduino board and in the other one the blank ATmega chip needs to be inserted. We will be using the ICSP (In Circuit Serial Programmer) pins of the arduino for this. After making the connections shown connect the working arduino to your PC. Next, open the arduino IDE and go to the tools menu; select burn bootloader and from it’s options click on w/ Arduino as ISP.  Now the chip will be bootloaded with arduino. This method works only if you have the correct chip specified in the boards.txt file and works only rarely. Hence I always prefer the first method.

Step 3 : Uploading the code and using the board

Now you have an arduino board with an arduino bootloader ATmega chip. Now use the Rx, Tx and Gnd pins to connect to a USB-UART TTL converter which can be used to connect to your PC. Or just insert a chip that has been uploaded with the program (from an arduino board) into this board’s socket. DIY: Make arduino board and bootload ATmega chip.